In the first part, we will create a cluster.
Quick start :)
Case:
Active-Active cluster
Two ISP
Management IP 192.168.0.10/24
DNS IP 192.168.0.20, 192.168.0.30
Gateway 192.168.0.1
6 ethernet card (1 management, 1 local, 1 isp1, 1 isp2, 2 system replication)
1. Login to console, assign IP for manage, DNS. Default cred: admin/admin
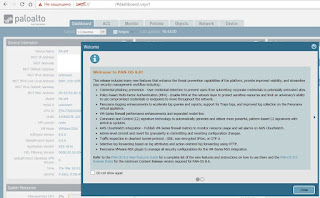
Next, go to web-console https://192.168.0.10
2. Go to "Device – Licenses - Activate feature using authorization code" on web-console.
Open https://support.paloaltonetworks.com "ASSETS – VM-Series Auth-Codes – Register VM – lic-file", register and download license.

3. Install license

4. Install updates


5. Set strong password

6. Create cluster: Assign network interface type (You can check network by mac-address, show interface all), zone, virtual router
Ethernet1/1 – ISP1
Ethernet1/2 – ISP2
Ethernet1/3 – repl
Ethernet1/4 – local
Ethernet1/5 – repl


7. Go to "Device – High Availability - General" and create Active-Active Cluster:
Section "Setup": type second node's ip address;
Section "Control Link (HA1)": choose "managment" interface;
Section "Data Link": choose first replication interface - Ethernet1/3, assign ip address.
Commit Config and repeat steps on second node.

8. Go to "Device – High Availability - Active/Active Config". Choose second replication interface - Ethernet1/5 for session replications. Assign virtual ip addresses(two ISP and local). Commit config.

9. Go to "Dashboard" and add "Widgets – System – High Availability". Check cluster.

10. Let's check!
Quick start :)
Case:
Active-Active cluster
Two ISP
Management IP 192.168.0.10/24
DNS IP 192.168.0.20, 192.168.0.30
Gateway 192.168.0.1
6 ethernet card (1 management, 1 local, 1 isp1, 1 isp2, 2 system replication)
1. Login to console, assign IP for manage, DNS. Default cred: admin/admin
Configure
set deviceconfig system ip-address 192.168.0.10 netmask 255.255.255.0 default-gateway 192.168.0.1 dns-setting servers primary 192.168.0.20
set deviceconfig system ip-address 192.168.0.10 netmask 255.255.255.0 default-gateway 192.168.0.1 dns-setting servers secondary 192.168.0.30
commit
Next, go to web-console https://192.168.0.10

2. Go to "Device – Licenses - Activate feature using authorization code" on web-console.
Open https://support.paloaltonetworks.com "ASSETS – VM-Series Auth-Codes – Register VM – lic-file", register and download license.

3. Install license

4. Install updates


5. Set strong password

6. Create cluster: Assign network interface type (You can check network by mac-address, show interface all), zone, virtual router
Ethernet1/1 – ISP1
Ethernet1/2 – ISP2
Ethernet1/3 – repl
Ethernet1/4 – local
Ethernet1/5 – repl


7. Go to "Device – High Availability - General" and create Active-Active Cluster:
Section "Setup": type second node's ip address;
Section "Control Link (HA1)": choose "managment" interface;
Section "Data Link": choose first replication interface - Ethernet1/3, assign ip address.
Commit Config and repeat steps on second node.

8. Go to "Device – High Availability - Active/Active Config". Choose second replication interface - Ethernet1/5 for session replications. Assign virtual ip addresses(two ISP and local). Commit config.

9. Go to "Dashboard" and add "Widgets – System – High Availability". Check cluster.

10. Let's check!
No comments:
Post a Comment